



Enrollment is the part of an EV code signing order that most guides stop at. The part that actually blocks people comes after: a sealed package arrives from a courier, it contains a USB token and a letter, and nothing on your machine can see either of them yet. This guide covers that stretch, from the moment the certificate is issued to the moment your build machine can present it to a signing tool.
Quick answer:
Setting up an EV code signing certificate means getting the private key hardware working on the machine that will sign, not installing a file. After the Certificate Authority finishes vetting your legal entity, it issues the certificate onto a hardware token and ships it, or issues it against hardware you already own.
To set up a shipped SafeNet eToken: install the SafeNet Authentication Client from the URL in the CA’s letter, restart the computer, open the client before plugging in the token, insert the token, then use Change Token Password to replace the initial password that the CA emailed you. Confirm the certificate is visible in the client’s advanced view (the gear icon) and in your Windows personal store, and copy its thumbprint, which is the value signing tools identify the certificate by.
Two cautions decide whether the setup succeeds: the token locks after a small number of wrong password attempts, three of them on Sectigo’s code signing tokens, and the administrator password that clears a lock is not the one you were sent and is not given to subscribers, so recovering a locked token is a support request to the Certificate Authority rather than anything you can do at your desk.
What Happens Between Enrollment and Delivery
Once you submit the order, the Certificate Authority validates your organization against the CA/Browser Forum’s code signing requirements. Extended Validation is a vetting level, not a technical feature of the certificate: the CA confirms that your legal entity exists, that it is in good standing in its jurisdiction of incorporation, that the address and phone number are real, and that the person requesting the certificate is authorized to do so on the organization’s behalf. That is slower and more document-heavy than an Organization Validated order, and it is normal for it to take several business days or longer if a registry lookup or a verified callback stalls.
SSL Dragon has separate walkthroughs of the vetting itself, because the paperwork differs by CA:
- How to validate Sectigo and Comodo code signing certificates
- How to validate DigiCert and GoGetSSL code signing certificates
This guide picks up after that is finished.
Why the key arrives on hardware
Since June 2023, the CA/Browser Forum has required the private key of a publicly trusted code signing certificate to be generated and protected in a hardware crypto module certified to at least FIPS 140-2 Level 2 or Common Criteria EAL 4+. Microsoft states the same requirement in its own guidance for Windows developers.
The practical consequence is the one worth internalizing before you open the package: the key must stay off your general-purpose computer. It is created inside the token or HSM, it never leaves that device, and signing works by sending a hash into the device and getting a signature back. There is no key file to copy, no PFX to back up, and no way to move the certificate to a second machine except by moving the hardware. That is why the certificate is couriered to a physical address instead of emailed, and why every step below is really about making the operating system talk to a piece of hardware.
Identify Which Delivery Route You Are On
Before following any procedure, check which of these you ordered. The choice is made at purchase time and cannot be changed afterwards, so the route you are on now is fixed.
- Token and shipping. The CA configures a USB token, loads the certificate and key onto it, and couriers it to the address from your enrollment. This is the common route and the one the rest of this guide documents.
- Install on hardware you already own. Nothing is shipped. You generate the key and a CSR on your own token or HSM, supply a key attestation proving the key was created in hardware, and receive the issued certificate to import. Sectigo’s accepted list runs to several devices, and the two with walkthroughs here are the YubiKey 5 FIPS and the Luna Network Attached HSM version 7 or later. DigiCert and GoGetSSL publish a fixed list built on the SafeNet eToken 5110 family, identified by Common Criteria part number: 5110 CC (940), 5110+ CC (940B) and 5110+ CC (940C), plus the 5110 FIPS, or your own qualifying HSM. If this is your route, the relevant guides are YubiKey 5 FIPS CSR generation and attestation, YubiKey 5 FIPS code signing certificate installation and the Luna Network Attached HSM CSR and attestation guide.
A third arrangement exists but is not a delivery option on these orders: a CA-operated cloud signing service, such as DigiCert’s KeyLocker, keeps the key in the CA’s own HSM and ships nothing. Coverage differs by CA and by validation level, Sectigo publishes no cloud signing service of its own, and where it is sold it is a separate product bought instead of a token order rather than a way of receiving one. So if a package is on its way to you, one of the two routes above is the one you are on.
If you are not sure which one your order used, the comparison in what code signing certificate delivery method to choose lists what each option includes, along with the shipping options and their fees.
What Is in the Package
Couriers used are typically FedEx or UPS, and the package is small enough to be easy to mislay. Contents vary slightly by Certificate Authority, but you should find:
- A USB token, usually a SafeNet eToken from Thales, carrying your certificate and its private key.
- A letter from the Certificate Authority with the URL for the client software and, depending on the CA, an order reference you may need for support.
The initial token password is normally not in the box. Sectigo sends it by email, in the same message that confirms shipment and carries the courier tracking number, so check that mailbox, including its spam folder, before you plug anything in. Do not start guessing the password at the token, for the reason explained in the lockout section below.
Step 1: Install the SafeNet Authentication Client
The token is a smart card device, and the operating system cannot read it without middleware. That middleware is the SafeNet Authentication Client. The product moved to Thales along with the rest of the SafeNet portfolio, so you will see Thales branding on the vendor site and on the installer, but the product name itself is unchanged.
Download it from the URL in the CA’s letter rather than from a general search result, because the CA points you at a build that matches the token it shipped. If the letter is missing, Sectigo publishes the download and its instructions at SafeNet Authentication Client download for Sectigo certificates on eToken, and Thales documents the client itself on its SafeNet Authentication Client product page.
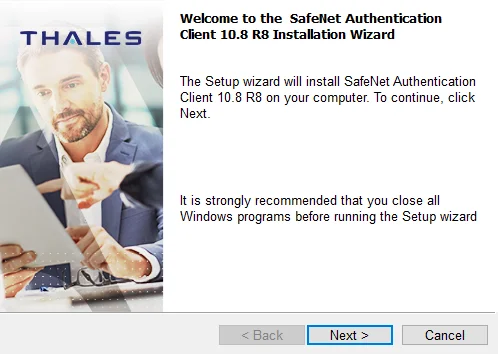
Pick the build that matches your platform. The client is not Windows-only: Thales publishes versions for Windows, macOS and several Linux distributions, so a macOS or Linux build machine is a supported setup rather than a workaround. On Windows, match the 32-bit or 64-bit build to the operating system, not to the application you plan to sign.
Two prerequisites are easy to miss, and Sectigo names both in its own instructions. You need administrator rights on the machine to run the installer, and the token must stay unplugged while the client installs. A token left connected through the installation is one of the two documented reasons a computer will not detect it afterwards, the other being the restart below. One more practical point: if the downloaded archive appears to contain no installer, the package ships it inside a disc image instead, so right-click the ISO file, choose Mount, open the MSI folder and run the build for your architecture.
Restart the computer once the installation finishes. Sectigo’s instructions say you “may need” to, and the installer can be told to skip the prompt entirely, so treat it as required rather than as a suggestion. The client registers a cryptographic service provider and a smart card service, and until the machine restarts, the token can be inserted and physically detected while remaining invisible to the certificate store and to any signing tool. Most reports of “the client cannot see my token” on a fresh install come down to a skipped restart.
Step 2: Open the Client, Then Insert the Token
Order matters here. Launch the SafeNet Authentication Client Tools application first, from the Start menu on Windows or the Applications folder on macOS, and let it finish loading. Only then insert the token into a USB port.
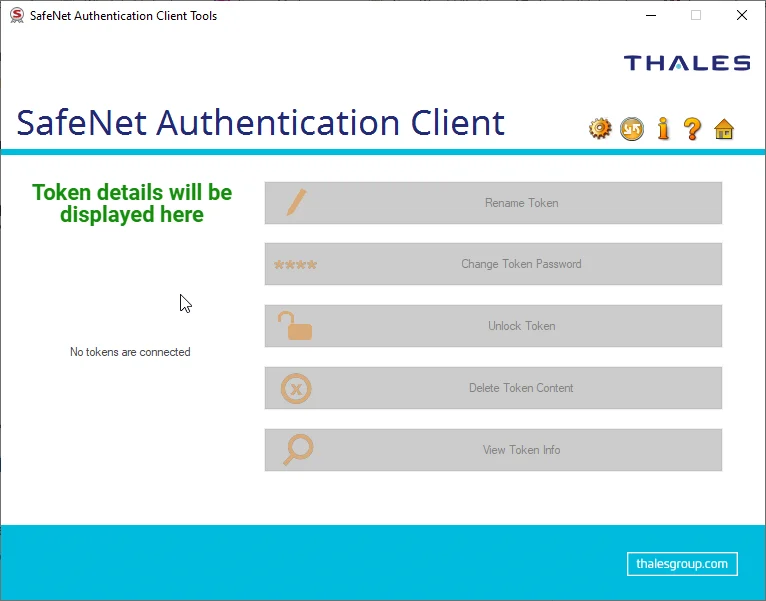
The client detects the token and shows it by name in the interface. A few practical points if it does not appear:
- Use a port on the machine itself. USB hubs, docking stations and KVM switches are a recurring cause of intermittent detection with smart card readers.
- Do not run the token through a remote desktop session on the first setup. Redirecting a smart card over RDP adds a second failure point on top of a setup you have not yet proved works locally.
- If you skipped the restart in step 1, do it now before troubleshooting anything else.
Step 3: Change the Token Password
The token ships with an initial password set by the Certificate Authority, and that password has been handled by people other than you. Change it before the token is used for anything.
In the client, select Change Token Password. Enter the CA-supplied password in Current Token Password, then your new password in New Token Password and again in Confirm Password. The dialog displays the complexity rules the device enforces, and it will reject a password that does not meet them.
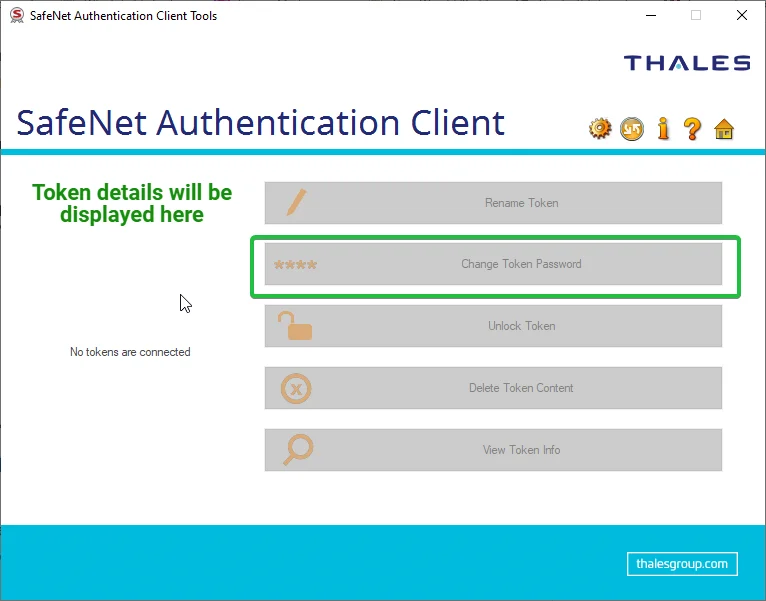
Record the new password somewhere your team can reach it, such as a shared password manager. A code signing token that only one person can unlock becomes a release blocker the first time that person is unavailable, and unlike most credentials in your stack, this one has no reset path.
The lockout rule, and why it is worth reading twice
These tokens enforce a retry counter. Enter the token password incorrectly too many times in a row and the device locks itself. The limit is set by the Certificate Authority when it initializes the token, so it varies by CA and by model: Sectigo documents three consecutive failures on its code signing and document signing tokens. Assume the number is small on whatever you were sent, and do not test it.
On consumer hardware a lockout is an inconvenience because you hold an administrator credential that clears it. Here you do not. The administrator password was set by the Certificate Authority when it initialized the token and is not given to the subscriber, so clearing a lock is a support case with the CA or your reseller rather than anything you can do at your desk. Sectigo will unlock a locked token, and will resend or reset a token password you have lost, but that is a ticket and a wait in the middle of a release. The prompt that asks for the administrator password is the dangerous one: Sectigo states that five failed attempts there lock the device permanently. Three rules follow directly:
- Never guess. If you are not certain of the password, stop and find the issuance email or contact support instead of trying one more time.
- Never enter anything in a prompt that asks for the administrator password or a PUK, and never run the client’s initialize or reinitialize action. Reinitializing wipes the private key, and the key cannot be regenerated because it was created inside the device.
- Keep the two outcomes apart. A token locked by wrong token password attempts is recoverable through CA support. A token permanently locked at the administrator prompt, or re-initialized, is not: that means reissuing the certificate on new hardware, at your cost and on the CA’s timeline.
Step 4: Confirm the Certificate Is Present and Usable
Detecting the token is not the same as having a usable certificate. Confirm both before you go anywhere near a build.
In the client, click the gear icon at the top right to switch into the advanced view.

In the left pane, expand your token and select User certificates. Your code signing certificate should be listed in the right pane. Double-click it to open its details.
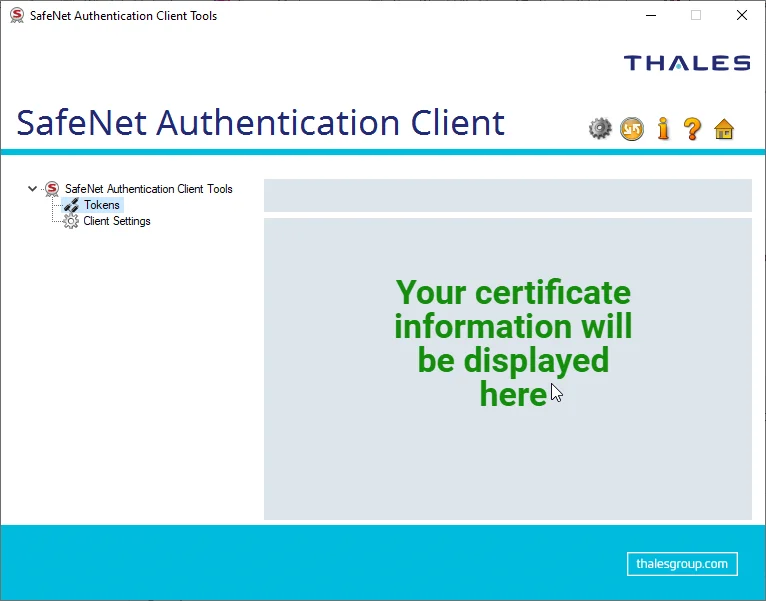
Check three things in the details window:
- The subject names your organization exactly as it was validated, not a placeholder or the CA’s own name.
- The validity period covers today. Since March 1, 2026 the CA/Browser Forum caps a code signing certificate at 460 days, and the CAs issue 459, so roughly fifteen months is the expected term rather than a mistake. The clock starts at issuance, not at delivery, so a package that sat in customs has already spent part of it.
- The thumbprint, on the Details tab at the bottom of the field list. Copy the hexadecimal value exactly, with no added spaces. This is the value signing tools use to select a specific certificate, so having it now saves you a trip back here later.
Confirm Windows sees it too
The client showing the certificate proves the middleware works. It does not prove that Windows surfaced the certificate into the store where signing tools look for it. With the token inserted and the client running, open a Command Prompt or PowerShell window and run:
certutil -user -store MyThe command lists the certificates in the current user’s personal store. Your code signing certificate should appear there, with the same subject and thumbprint you just read in the client. If it does not, the middleware is installed but the certificate is not exposed to the store: restart the machine if you have not since installing, then unplug and reinsert the token.
One detail to expect rather than be alarmed by: the certificate appears under the account that is signed in when the token is inserted. Run it under a different user, or under a service account in a build agent, and it will not be there. Code signing on a shared build machine needs the token inserted in a session belonging to the account that runs the signing step.
Step 5: Sign Something
Setup is finished once the certificate is visible in both places and you have its thumbprint. The next task belongs to a different subject and has its own guide: see how to sign an EXE file using a code signing certificate for the SignTool syntax, timestamping, and how to verify the resulting signature.
Do the first signature on a throwaway binary rather than on a release candidate. It confirms the whole chain works, and it also tells you how the token behaves under your client’s password policy, which decides how a build pipeline has to be arranged. Depending on how the client is configured, the token may prompt for its password on every signature or hold it for a period, and that difference is the single biggest constraint on automating signing with a physical token.
Frequently Asked Questions
It comes from the Certificate Authority, not from the package. Sectigo emails it to the administrative contact on the order when the certificate is issued, so search that mailbox, including spam and quarantine, before touching the token. If you cannot find it, ask the CA or your reseller to resend it, which Sectigo will do. Do not try candidate passwords at the token: the retry counter is small, three attempts on a Sectigo token, and clearing a lock afterwards means opening a support case rather than resetting anything yourself.
The token locks. The limit is set by the Certificate Authority when it initializes the device, so it varies by CA and model, and Sectigo documents three consecutive failures on its code signing tokens. Unlocking needs the administrator password, which the CA set at initialization and does not give to subscribers, so the fix is a support case with the CA or your reseller rather than anything you can do locally. Sectigo will unlock the token and can resend or reset the token password. Two things are genuinely unrecoverable, and both are avoidable: Sectigo states that five failed attempts at the administrator prompt lock the device permanently, and running the client’s initialize or reinitialize action destroys the private key. The key cannot be recreated, because it was generated inside the device and never existed anywhere else, so either outcome means reissuing the certificate on new hardware at your cost.
You can export the certificate, which is public information. You cannot export the private key. Since June 2023 the CA/Browser Forum requires code signing keys to be generated and held in a hardware crypto module certified to at least FIPS 140-2 Level 2 or Common Criteria EAL 4+, and the token enforces that by making the key non-exportable. There is no backup, no PFX file and no second copy on another machine. Moving the ability to sign means moving the physical device, and losing the device means reissuing the certificate.
Not any more, and this is worth knowing before you plan a release around it. EV code signing certificates used to receive positive SmartScreen reputation automatically, so a brand-new file signed with one downloaded without a warning. Microsoft removed that behavior in 2024 and documents the current position in its developer guidance: EV-signed files now build reputation through the same hash-based process as files signed with an Organization Validated certificate, and warnings on a new binary are expected until it accumulates download history. Expect the same on your first release regardless of validation level. What EV still provides is the stricter identity vetting behind the certificate, which some enterprise procurement processes and internal software policies specifically require.
Yes. Thales publishes SafeNet Authentication Client builds for Windows, macOS and several Linux distributions, and the token itself is platform-independent. The step that is Windows-specific is the last one: SignTool is a Windows SDK tool, so the standard Microsoft signing toolchain runs on Windows, and third-party tools are what cover Authenticode signing from other platforms. A common arrangement is to manage the token from whichever desktop is convenient and keep a Windows machine or virtual machine for the signing step itself.
In order of how often each one is the answer: restart the computer if you have not since installing the client, because the smart card service and cryptographic provider only register on restart. Plug the token directly into the machine rather than through a hub, dock or KVM. Open the client before inserting the token instead of after. Avoid remote desktop sessions until the setup is proved working locally. If the client still shows nothing, try a different USB port and a different machine before assuming the token is faulty, since that distinguishes a driver problem from a hardware one.
Open the SafeNet Authentication Client, click the gear icon to enter the advanced view, expand your token in the left pane and select User certificates. Double-click your code signing certificate, open the Details tab, scroll to Thumbprint at the bottom of the field list and copy the hexadecimal value with no extra spaces. On Windows you can also read it from the output of certutil -user -store My, which is useful when you want it in a script rather than by hand.
No. The delivery method is fixed when the order is placed, because the key is generated on the hardware chosen at that point and cannot be moved afterwards. Switching between a shipped token and hardware you already own means cancelling the order and buying again with the other method selected. Moving to a CA-operated cloud signing service is a larger change still, since on these products that is a separate purchase rather than a delivery option. The options and what each one includes are compared in what code signing certificate delivery method to choose.
No, and it cannot be. The certificate lives on the token, so only the machine with the token physically attached can sign. The usual arrangement is a single designated signing machine or build agent that holds the token, with developers submitting builds to it rather than each holding signing capability. That is also the safer arrangement: fewer people able to sign means fewer ways for your organization’s identity to end up on code you did not write.
Once the certificate is set up, continue with how to sign an EXE file using a code signing certificate, or browse the full set of code signing tutorials.
Risparmia il 10% sui certificati SSL ordinando oggi stesso da SSL Dragon!
Emissione rapida, crittografia avanzata, affidabilità del browser al 99,99%, assistenza dedicata e garanzia di rimborso entro 25 giorni. Codice coupon: SAVE10

